本文将介绍使用官方源和第三方源在 Debian 12 和 Ubuntu 22.04 安装最新版 Nginx + PHP + MySQL 的教程,并且可以自行选择 PHP 版本。
PS:本文同时适用于 Debian 11 Bullseye, Debian 10 Buster,Ubuntu 20.04 Focal 以及 Ubuntu 22.04 Jammy
以下操作需要在 root 用户下完成,请使用 sudo -i 或 su root 切换到 root 用户进行操作。
1、更新系统并安装部分必要软件
apt update
apt upgrade -y
apt dist-upgrade -y
apt install curl vim wget gnupg dpkg apt-transport-https lsb-release ca-certificates
如果您通过 iso 方式安装 Debian 12 并且设置了 root 密码,则默认不带 sudo 包,使用 apt install sudo 安装即可
2、增加烧饼博客打包的 Nginx 源并安装
这里我们推荐 烧饼博客 团队打包的 Nginx 源,这货是会官方 Nginx 打包组的基础上,保持更新最新版本的 Nginx 以及 OpenSSL。
2.1 首先增加 Key
curl -sSL https://n.wtf/public.key | gpg --dearmor > /usr/share/keyrings/n.wtf.gpg2.2 然后增加 Nginx 源
echo "deb [arch=$(dpkg --print-architecture) signed-by=/usr/share/keyrings/n.wtf.gpg] https://mirror-cdn.xtom.com/sb/nginx/ $(lsb_release -sc) main" > /etc/apt/sources.list.d/n.wtf.list国内机器可以用清华 TUNA的国内源:
echo "deb [arch=$(dpkg --print-architecture) signed-by=/usr/share/keyrings/n.wtf.gpg] https://mirrors.tuna.tsinghua.edu.cn/u.sb/ $(lsb_release -sc) main" > /etc/apt/sources.list.d/n.wtf.list2.3 接着更新并安装 Nginx
apt update
apt install nginx-extras -y
安装完毕后,我们可以使用 nginx -V 命令看到 Nginx 已经是最新的 1.25.2 主线版了:
root@debian ~ # nginx -V
nginx version: nginx-n.wtf/1.25.2
built with OpenSSL 3.1.2+quic 1 Aug 2023
3、增加 Ondřej Surý 大神打包的 PHP 源并安装 PHP 8.x
Ondřej Surý 大佬打包的 PHP 源更好用,Ubuntu 的 PPA for PHP 就是这位大佬做的,当然少不了 Debian 的源了,下面一步一步来。
3.1 Debian 和 Ubuntu 安装 LNMP 区别
唯一区别就是 PHP 的安装添加源方法不一样,其他的步骤都一毛一样。
3.2 加入大神做好的源
Debian
wget -O /usr/share/keyrings/php.gpg https://packages.sury.org/php/apt.gpg
echo "deb [arch=$(dpkg --print-architecture) signed-by=/usr/share/keyrings/php.gpg] https://packages.sury.org/php/ $(lsb_release -sc) main" > /etc/apt/sources.list.d/php.list
Ubuntu
add-apt-repository ppa:ondrej/php3.3 更新系统
apt update
apt upgrade -y
3.4 安装自己需要的 PHP 版本
这个源目前默认的 PHP 是 8.2.x ,如果您需要 8.1.x 或 8.0.x 或 7.x 或 5.6.x 那么请修改对应的 PHP 版本号(注意配置文件哦)。
这里举例 WordPress 需要的部分 PHP 包:
安装 PHP 8.2.x:
apt install php8.2-fpm php8.2-cli php8.2-mysql php8.2-curl php8.2-gd php8.2-mbstring php8.2-xml php8.2-zip php8.2-imap php8.2-opcache php8.2-soap php8.2-gmp php8.2-bcmath -y安装 PHP 8.1.x:
apt install php8.1-fpm php8.1-cli php8.1-mysql php8.1-curl php8.1-gd php8.1-mbstring php8.1-xml php8.1-zip php8.1-imap php8.1-opcache php8.1-soap php8.1-gmp php8.1-bcmath -y安装 PHP 8.0.x:
apt install php8.0-fpm php8.0-cli php8.0-mysql php8.0-curl php8.0-gd php8.0-mbstring php8.0-xml php8.0-zip php8.0-imap php8.0-opcache php8.0-soap php8.0-gmp php8.0-bcmath -y以下版本 PHP 已经 EOL,PHP 官方不再提供支持,请尽快更新您的程序兼容最新的 PHP,如果您的程序还未兼容,建议鞭策开发者
安装 PHP 7.4.x:
apt install php7.4-fpm php7.4-cli php7.4-mysql php7.4-curl php7.4-gd php7.4-mbstring php7.4-xml php7.4-xmlrpc php7.4-zip php7.4-json php7.4-imap php7.4-opcache php7.4-soap php7.4-gmp php7.4-bcmath -y安装 PHP 7.3.x:
apt install php7.3-fpm php7.3-mysql php7.3-curl php7.3-gd php7.3-mbstring php7.3-xml php7.3-xmlrpc php7.3-zip php7.3-opcache安装 PHP 7.2.x (PHP 7.2 开始已经不支持 mcrypt 组件):
apt install php7.2-fpm php7.2-mysql php7.2-curl php7.2-gd php7.2-mbstring php7.2-xml php7.2-xmlrpc php7.2-zip php7.2-opcache安装 PHP 7.1.x:
apt install php7.1-fpm php7.1-mysql php7.1-curl php7.1-gd php7.1-mbstring php7.1-mcrypt php7.1-xml php7.1-xmlrpc php7.1-zip php7.1-opcache安装 PHP 7.0.x:
apt php7.0-fpm php7.0-mysql php7.0-curl php7.0-gd php7.0-mbstring php7.0-mcrypt php7.0-xml php7.0-xmlrpc php7.0-zip php7.0-opcache安装 PHP 5.6.x:
apt install php5.6-fpm php5.6-mysql php5.6-curl php5.6-gd php5.6-mbstring php5.6-mcrypt php5.6-xml php5.6-xmlrpc php5.6-zip php5.6-opcache如果希望安装其他组件,可以通过搜索看看有没有对应的包:
apt-cache search php8.2* | grep php修改 php.ini 防止跨目录攻击,如果安装的 PHP 8.2.x 请修改 /etc/php/8.2/fpm/php.ini PHP 7.4.x 请对应修改
/etc/php/7.4/fpm/php.ini:
sed -i 's/;cgi.fix_pathinfo=1/cgi.fix_pathinfo=0/' /etc/php/8.2/fpm/php.ini 修改 php.ini 增加上传大小限制,比如我们设置 10MB:
sed -i 's/upload_max_filesize = 2M/upload_max_filesize = 10M/' /etc/php/8.2/fpm/php.ini
sed -i 's/post_max_size = 8M/post_max_size = 10M/' /etc/php/8.2/fpm/php.ini
您也可以同时安装多个 PHP 版本,然后使用以下命令选择系统默认的 PHP 版本:
update-alternatives --config php3.5 重启 PHP 和 Nginx
systemctl restart php8.2-fpm对应 PHP 7.4.x 命令如下:
systemctl restart php7.4-fpmNginx 参考配置文件如下,新建立个 /etc/nginx/sites-available/example.com.conf:
cat >> /etc/nginx/sites-available/example.com.conf << EOF
server {
        listen 80;
        listen [::]:80;

# 指定网站目录,可根据自己情况更换,建议放在 /var/www 目录下
        root /var/www/example.com;
        index index.php index.html index.htm;

# 默认第一个域名,替换 example.com 为您的域名
        server_name example.com;

        location / {
            try_files \$uri \$uri/ =404;
        }

# 开启 PHP8.1-fpm 模式,如需要安装 PHP 7.4.x 请修改为 fastcgi_pass unix:/run/php/php7.4-fpm.sock;
        location ~ \.php$ {
            include snippets/fastcgi-php.conf;
            fastcgi_pass unix:/run/php/php8.2-fpm.sock;
        }
}
EOF
然后把这个配置文件软链接到 /etc/nginx/sites-enabled 目录使其生效:
ln -s /etc/nginx/sites-available/example.com.conf /etc/nginx/sites-enabled/example.com.conf到这里基本没有问题,可以直接重新加载 Nginx:
nginx -t
nginx -s reload
或者暴力点直接重启 Nginx:
systemctl restart nginx我们的目录在 /var/www/example.com, 我们先创建这个目录:
mkdir -p /var/www/example.com然后创建一个 phpinfo.php 并输入 phpinfo() 函数:
cat >> /var/www/example.com/phpinfo.php << EOF
<?php phpinfo(); ?>
EOF
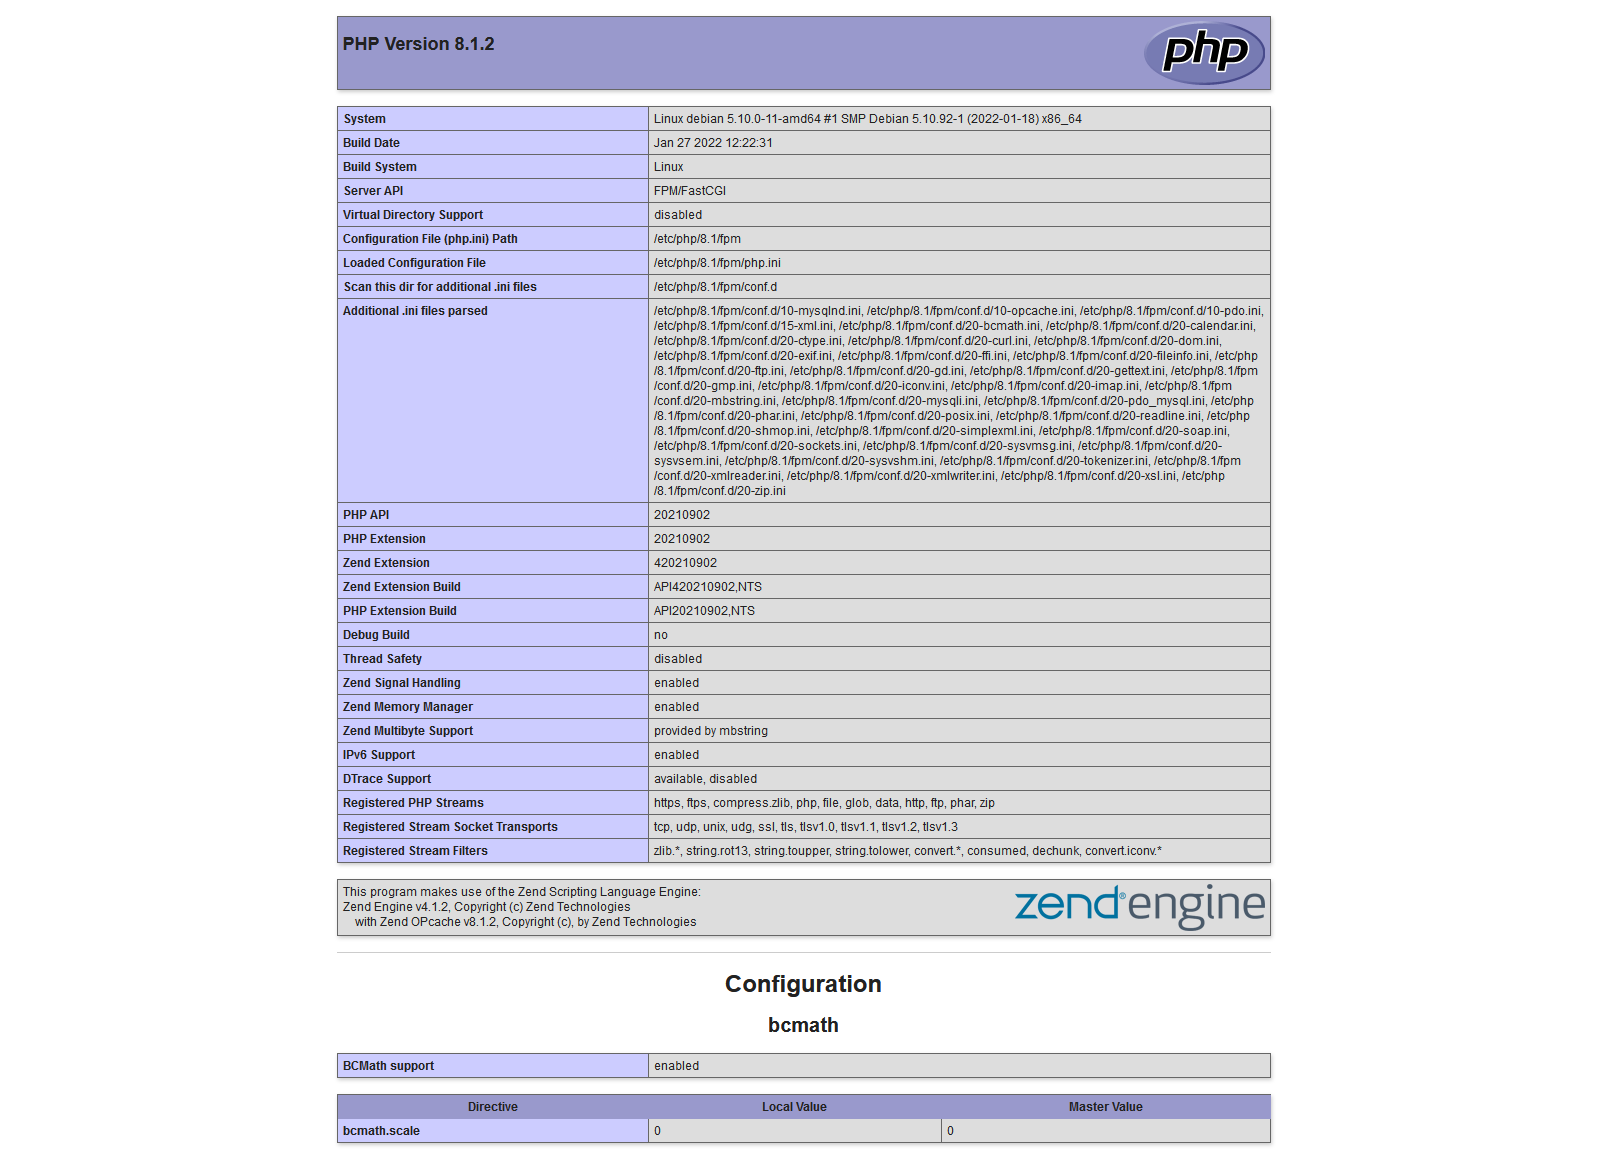
好了,此时在浏览器输入 http://example.com/phpinfo.php,如果看到经典的 phpinfo 页面则说明安装成功,如果不成功,请仔细对比步骤查找哪里出错。
效果如下:
4、安装 MariaDB
自从 Debian 9.x Stretch 开始,Debian 已经默认使用 Mariadb,所以我们不做对于 MySQL 和 MariaDB 的争论,直接跟着开源社区走即可。
4.1 首先,添加并导入 Mariadb 的官方源
下载 GPG Key:
curl -sSL https://mariadb.org/mariadb_release_signing_key.asc | gpg --dearmor > /usr/share/keyrings/mariadb.gpg然后添加 MariaDB 的源:
Debian
echo "deb [arch=$(dpkg --print-architecture) signed-by=/usr/share/keyrings/mariadb.gpg] https://mirror-cdn.xtom.com/mariadb/repo/10.11/debian $(lsb_release -sc) main" > /etc/apt/sources.list.d/mariadb.listUbuntu
echo "deb [arch=$(dpkg --print-architecture) signed-by=/usr/share/keyrings/mariadb.gpg] https://mirror-cdn.xtom.com/mariadb/repo/10.11/ubuntu $(lsb_release -sc) main" > /etc/apt/sources.list.d/mariadb.list国内可以用清华 TUNA 的源:
Debian
echo "deb [arch=$(dpkg --print-architecture) signed-by=/usr/share/keyrings/mariadb.gpg] https://mirrors.tuna.tsinghua.edu.cn/mariadb/repo/10.11/debian $(lsb_release -sc) main" > /etc/apt/sources.list.d/mariadb.listUbuntu
echo "deb [arch=$(dpkg --print-architecture) signed-by=/usr/share/keyrings/mariadb.gpg] https://mirrors.tuna.tsinghua.edu.cn/mariadb/repo/10.11/ubuntu $(lsb_release -sc) main" > /etc/apt/sources.list.d/mariadb.list您也可以在这儿找到更多的 MariaDB 源。
4.2 接着更新一下系统
apt update4.3 然后直接安装最新稳定版 MariaDB
apt install mariadb-server安装完毕后强烈推荐使用 mysql_secure_installation 命令做一次安全设置。
4.4 创建数据库并测试
开启数据库之前,您可以使用 pwgen 这个小工具或者随机密码生成器生成一个强大的随机密码,比如 32 位,然后随意挑选一个使用
apt install pwgen
pwgen 32
使用 MySQL root 用户登陆,因为默认使用 Unix domain socket 模式,所以本机不需要 MySQL root 密码即可登录:
mysql -u root创建数据库 example_database:
CREATE DATABASE example_database DEFAULT CHARACTER SET utf8mb4 COLLATE utf8mb4_unicode_ci;创建用户名 example_user 并赋予权限:
GRANT ALL ON example_database.* TO 'example_user'@'localhost' IDENTIFIED BY '这里改成您要设置的强大的没人能猜出来的随机的密码';刷新 MySQL 权限:
FLUSH PRIVILEGES;没问题以后就可以退出了:
EXIT;新建立一个 /var/www/example.com/mysql-test.php 文件并测试:
cat >> /var/www/example.com/mysql-test.php << EOF
<?php
\$dbname = 'example_database'; //MySQL 数据库名
\$dbuser = 'example_user'; //MySQL 用户名
\$dbpass = '您的强大的没人可以猜出来的密码';
\$dbhost = 'localhost'; //安装在本地就用 localhost
\$link = mysqli_connect(\$dbhost, \$dbuser, \$dbpass) or die("Unable to Connect to '\$dbhost'");
mysqli_select_db(\$link, \$dbname) or die("Could not open the db '\$dbname'");
\$test_query = "SHOW TABLES FROM \$dbname";
\$result = mysqli_query(\$link, \$test_query);
\$tblCnt = 0;
while(\$tbl = mysqli_fetch_array(\$result)) {
\$tblCnt++;
#echo \$tbl[0]."<br />\n";
}
if (!\$tblCnt) {
echo "MySQL is working fine. There are no tables.";
} else {
echo "MySQL is working fine. There are \$tblCnt tables.";
}
?>
EOF创建完毕后访问 http://example.com/mysql-test.php 如果出现 MySQL is working fine. There are no tables. 则说明 MariaDB 工作正常。
5、安装 MySQL 8.0 (可选)
如果您必须使用某些 MySQL 8.0 才有的功能,那么可以按照 MySQL 官网的教程安装 MySQL 8.0。
注意: 除非您知道您在做什么,否则不要同时安装 MySQL 和 MariaDB。
5.1 添加 apt 源
wget https://repo.mysql.com/mysql-apt-config_0.8.25-1_all.deb
dpkg -i mysql-apt-config_0.8.25-1_all.deb
国内的机器可以在添加完成后修改为清华 TUNA 源,您可以修改 /etc/apt/sources.list.d/mysql-community.list 文件,替换成如下内容:
deb https://mirrors.tuna.tsinghua.edu.cn/mysql/apt/debian $(lsb_release -sc) mysql-5.6 mysql-5.7 mysql-8.0 mysql-tools5.2 安装 MySQL 8.0
apt update
apt install mysql-server -y
默认 MySQL 会安装最新的 8.0 版本,如果您需要更低的版本,比如 5.6 或 5.7,可以使用如下命令:
dpkg-reconfigure mysql-apt-config您可能需要设置一个强大的 root 密码,接下来的步骤和 MariaDB 相同,不再赘述。
好了,以上就是基本的 Debian 12.x "bookworm" 安装最新版 LNMP 的教程,如有问题可以随时发评论留言讨论。
转载自:https://u.sb/debian-install-nginx-php-mysql/


